
The quick answer
Press Shift-Command-5 on a Mac and you can record the whole screen or a selected area, but macOS saves that recording as a video. It does not include a direct GIF option.
To record straight to GIF, open GifJot or press Option-Command-G, select the part of the screen that matters, record the action once, and stop. GifJot saves the GIF locally and can copy it so it is ready to paste.
Choose the right workflow
| Method | What you get | Best when |
|---|---|---|
| GifJot | A GIF recorded directly from a selected area | You need a short loop for a bug report, doc, or message |
| Shift-Command-5 | A screen recording saved as video | You need a longer recording or plan to convert it later |
| Shift-Command-4 | A still PNG screenshot | Nothing moves and one image explains the point |
Record directly to GIF with GifJot
- Start the GIF recorder
Open GifJot from the menu bar or press Option-Command-G from any app.
- Select the useful area
Drag around the control, menu, or window region the viewer needs. A smaller frame is easier to follow and produces a smaller file.
- Record the action once
Start recording, perform the step, and stop as soon as the result is visible. Short loops are clearer than long walkthroughs.
- Save, copy, or add a note
GifJot saves the GIF on your Mac. Copy it for pasting, reveal it in Finder, record the same area again, or open Jot for a lightweight annotation.
What a screen-to-GIF capture looks like
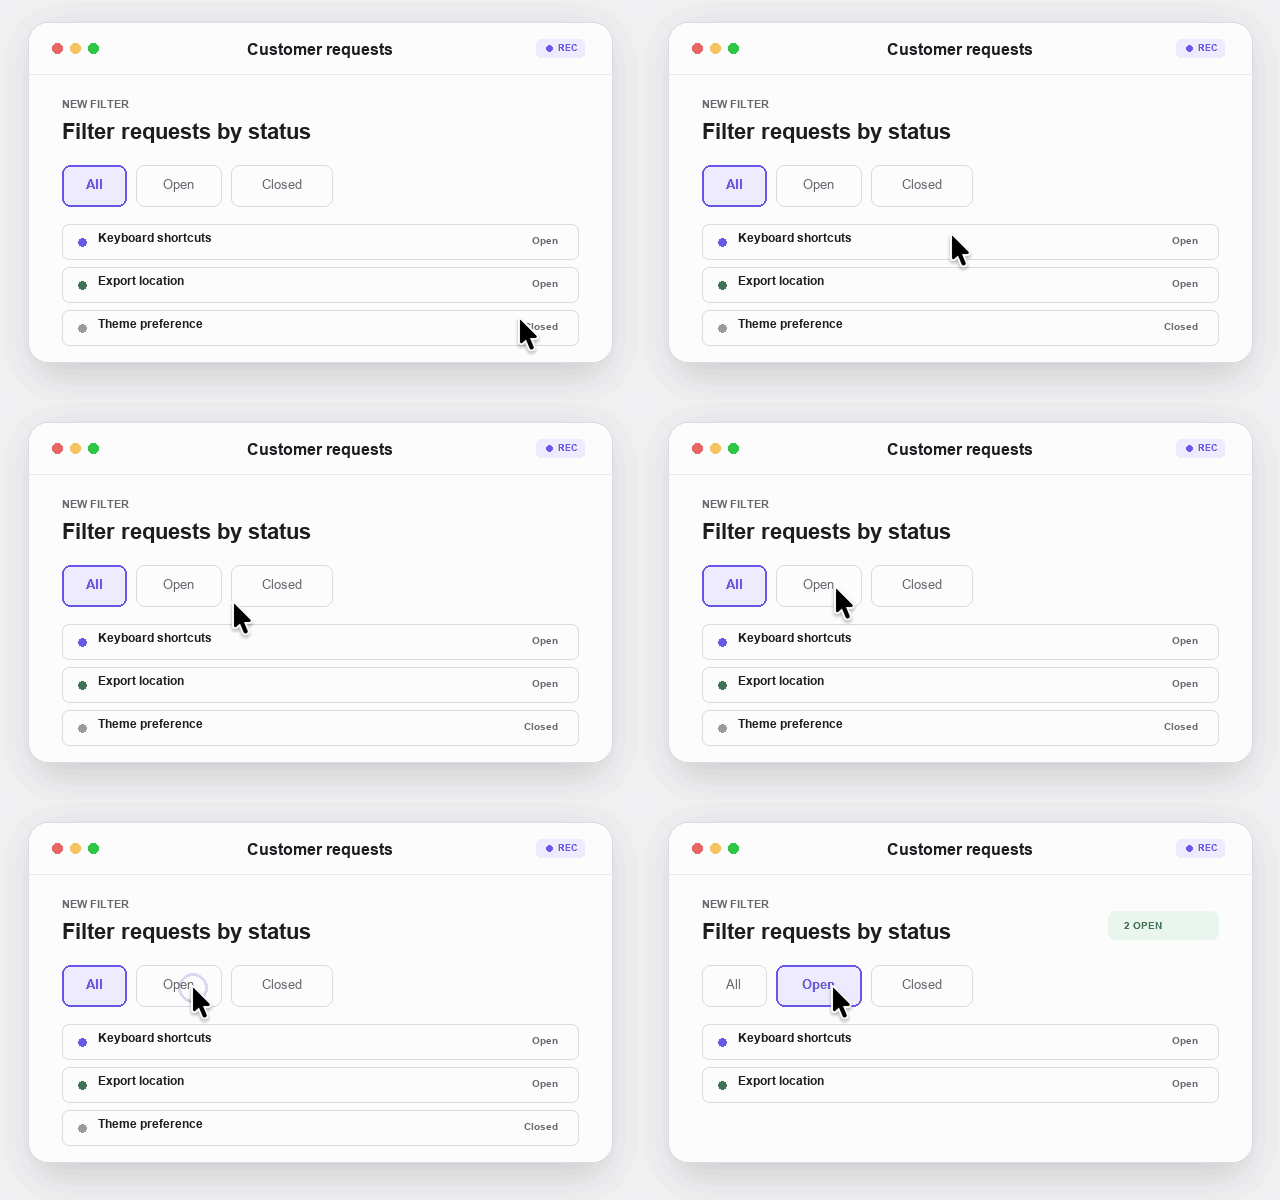
A useful screen GIF shows one action inside a tight frame. The example below records only the interface that changes, so the result can loop without making the viewer search the whole screen.
Choose settings for the job
- Output size: keep the frame close to the action. Reducing unnecessary pixels usually matters more than any other setting.
- Frame rate: use a lower rate for menus, settings, and form changes; raise it only when smoother motion is important.
- Pointer and click markers: include them when the viewer needs to know exactly where you clicked.
- Countdown: turn it on when you need time to place the pointer or open a menu before recording begins.
- Copy after recording: enable it when the next step is pasting into an issue, document, or team message.
Keep the GIF small and clear
- Crop to the smallest area that still provides context.
- Record one action rather than an entire workflow.
- Pause briefly on the final state, then stop.
- Avoid large video, animation, or rapidly changing backgrounds inside the capture.
- Use a PNG when motion is not necessary.
If macOS blocks the first recording
A screen recorder needs permission before it can see other apps. Open System Settings, choose Privacy & Security, and enable GifJot under Screen Recording or Screen & System Audio Recording. Reopen GifJot if macOS asks you to do so.
GifJot records and encodes the selected area on your Mac. The app does not upload captures or require an account.
Use a GIF, PNG, or video?
Use a GIF for a short, silent action that should play automatically in a bug report, help document, or message. Use a PNG when a still image tells the whole story.
Use a silent MP4 when you want a smaller file or a longer motion capture. Use another video tool when you need audio, a long lesson, or detailed editing; GifJot does not record sound or provide a video timeline.
Sources
- Apple: How to record your Mac screenApple shows how its built-in video recorder works.
- GifJot on GitHubSee what GifJot can do today.